How to Create a Personal Tech Recovery Kit Before Your Phone or Laptop Fails
A practical guide to building a simple tech recovery kit with backup codes, device details, chargers, cloud access steps, and emergency checks before something breaks.
If your phone died tonight, could you still get into your email, bank app, cloud files, password manager, and two-factor authentication codes?
That question sounds dramatic until it happens on an ordinary Tuesday. A dropped phone. A laptop that refuses to boot. A password manager locked behind a code that only lived on the broken device. Suddenly, the real problem is not the device. It is access.
A personal tech recovery kit is a small set of notes, backup methods, and physical items that help you recover faster when a device fails, gets lost, or locks you out. It is not a complicated security project. It is a practical safety net for normal people who rely on phones, laptops, apps, cloud storage, and online accounts every day.

What a Tech Recovery Kit Should Do
A good recovery kit answers five simple questions:
- How do I get back into my main accounts?
- Where are my important files backed up?
- What device details would I need for repairs, insurance, or support?
- What physical accessories would help me get online quickly?
- Who can help if I am locked out and cannot receive codes?
That is the whole idea. You are building a bridge back into your digital life before the bridge is needed.
The key is to keep the kit small. If it becomes a giant binder, you will avoid updating it. Aim for a 30-minute setup and a 10-minute review every few months.
Start With Your Critical Accounts
Make a short list of the accounts that would cause real stress if you lost access. Keep it focused.
For most people, that list includes:
- Main email account
- Phone account or Apple ID/Google account
- Password manager
- Banking apps
- Cloud storage
- Work or school login
- Two-factor authentication app
- Mobile carrier account
Do not write down actual passwords in plain view. Instead, write down where recovery happens and what backup options exist.
For example, your note might say:
- Main email: recovery email is personal Gmail, backup phone is current number
- Password manager: emergency kit printed and stored in home folder
- Cloud files: laptop documents backed up to OneDrive every Sunday
- Mobile carrier: login uses email, support PIN stored in password manager
That kind of note is useful without becoming a risky password sheet.
Save Backup Codes the Right Way
Many important accounts offer backup codes for two-factor authentication. These are one-time codes you can use if your phone or authenticator app is unavailable.
They are easy to ignore. Do not ignore them.
Generate backup codes for your main email, password manager, Apple ID or Google account, Microsoft account, and any work login that allows it. Then store them somewhere safer than your phone camera roll.

A simple method:
| Item | Where to Keep It |
|---|---|
| Printed backup codes | Sealed envelope in a locked drawer |
| Password manager emergency sheet | Home file folder or small safe |
| Recovery email details | Written as hints, not full passwords |
| Device unlock notes | Password manager secure note |
| Support PINs | Password manager, not a screenshot |
One concrete detail: when I tested this workflow, the most useful item was not a charger or a flash drive. It was a printed password manager recovery sheet that took about 4 minutes to find and prevented a long lockout.
Check Your Backup Before You Trust It
A backup is only useful if it can be restored. That sounds obvious, but many people never check.
Pick one important folder and confirm it exists in your backup location. For example, open Google Drive, iCloud Drive, OneDrive, Dropbox, or your external drive and check whether your recent documents, photos, tax files, or work folder are actually there.
Then test one small restore. Download a file from the cloud or copy one file back from an external SSD. If it opens normally, your backup is more than a comforting icon in the menu bar.

Your recovery kit should include a short backup note:
- What is backed up
- Where it is backed up
- How often it updates
- Which device runs the backup
- How to restore one file
Keep this written in plain language. Future-you may be stressed, rushed, or standing in a repair shop with 12 percent battery.
Add Basic Device Information
If a phone, laptop, tablet, or router breaks, support teams often ask for details you may not remember.
Add these items to your kit:
- Device model
- Serial number or service tag
- Purchase month and year
- Warranty end date
- Repair history
- Mobile carrier name
- Router admin address
- Important cable type, such as USB-C, Lightning, or HDMI
You can store this in a password manager secure note, a printed sheet, or both. Avoid keeping the only copy on the device that might fail.
This is especially helpful for families. If you manage a parent’s phone, a child’s tablet, or a shared home laptop, write down enough information so someone else could help without guessing.
Build a Small Physical Kit
Digital recovery still needs physical basics. A dead phone cannot show backup codes. A laptop with no charger cannot upload files before repair. A missing SIM tool can make a simple phone swap annoying.
Your physical tech recovery kit can be small enough to fit in a drawer pouch.
Include:
- Spare USB-C or phone charging cable
- Wall adapter
- Small power bank if you already own one
- SIM eject tool
- Flash drive or external SSD if you use local backups
- Paper envelope for printed recovery codes
- Tiny notebook or index cards
- Pen
- Label with your name or household name, but no passwords
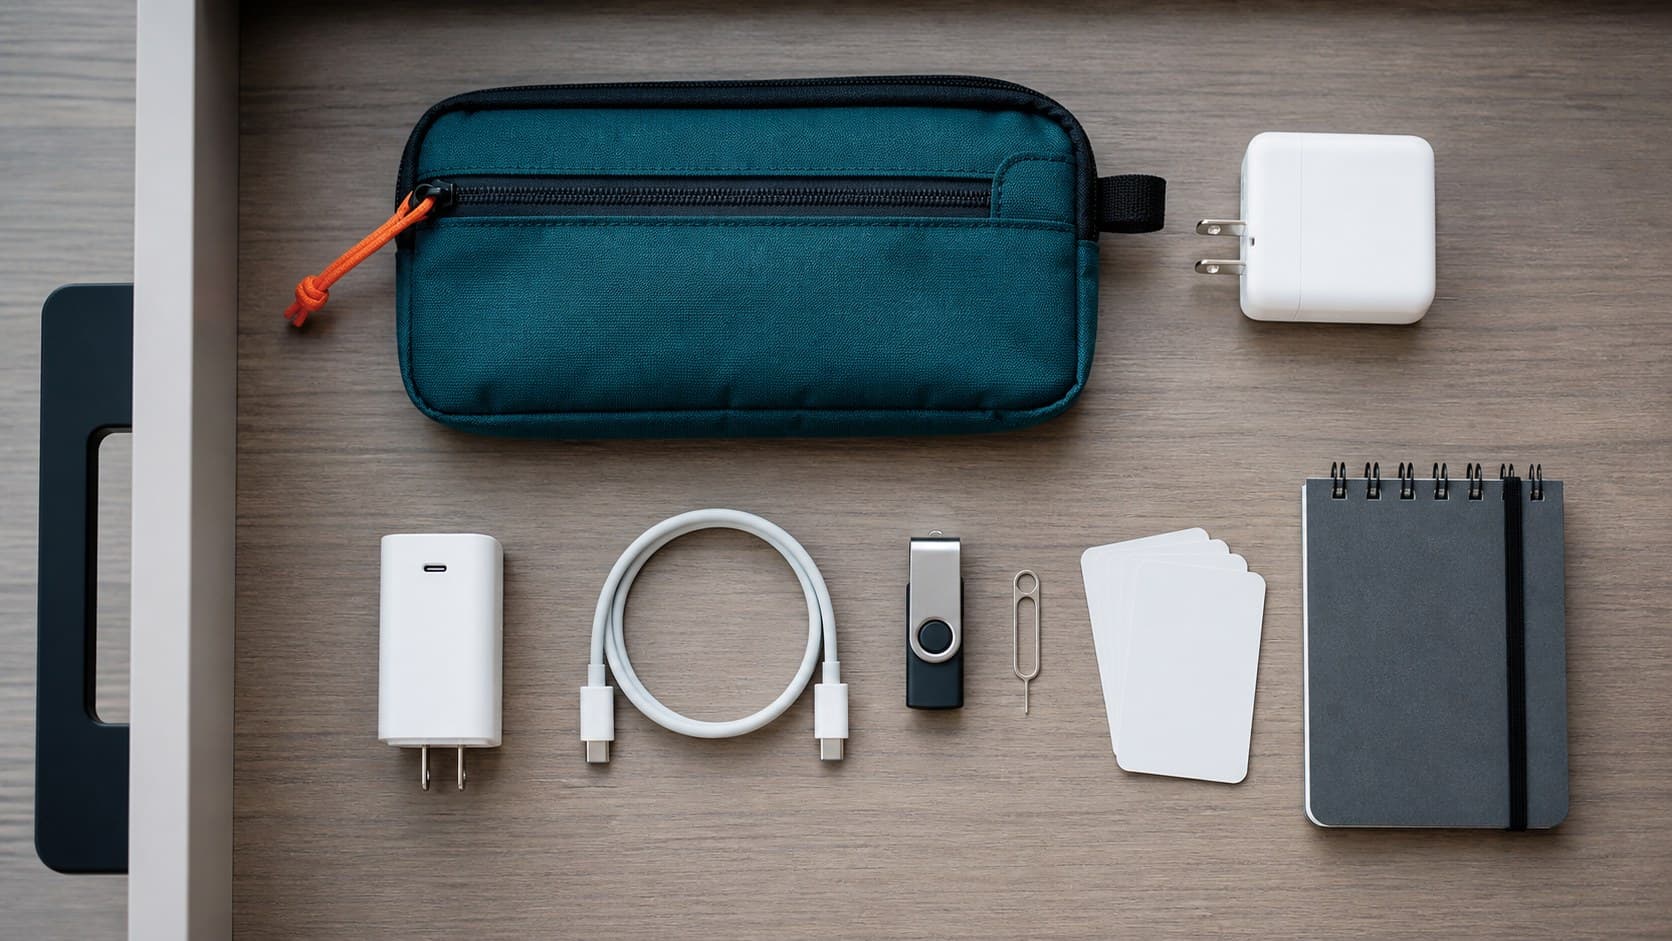
Do not overpack it. This is not a travel electronics bag. It is the small “get me back in” kit.
Set Up Account Recovery Contacts Where Available
Some platforms let you choose trusted recovery contacts or recovery keys. These features can help if you lose access to your account, but they deserve care.
Use them only with people you trust and understand. A recovery contact should be someone stable, reachable, and calm under pressure. A spouse, sibling, adult child, or close friend may be a fit. A casual coworker probably is not.
Write down who your recovery contact is and which account uses that option. Do not write sensitive codes in a shared note with them unless the platform specifically tells you to.
Keep It Safe, But Not Impossible to Find
A recovery kit should be protected from strangers, but reachable during a real problem. That balance matters.
Good places include:
- A locked drawer
- A home document folder
- A small safe
- A password manager secure note
- A sealed envelope stored with important papers
Risky places include:
- A photo album on your phone
- A random notes app page with passwords
- A cloud document titled “Passwords”
- A sticky note on your laptop
- A drawer anyone in the house opens daily
For many households, the best setup is split: sensitive secrets in a password manager, printed backup codes sealed away, and non-secret device details in a simple document.
Review It Every 3 Months
Put a recurring reminder on your calendar for every 3 months. Call it “tech recovery check” or something plain.
During the review, check:
- Did you change phones?
- Did you change your main email?
- Did you replace a laptop?
- Did you move to a new password manager?
- Did you turn on two-factor authentication for a new account?
- Did your backup drive or cloud plan change?
- Did a recovery contact change phone numbers?
This review should take about 10 minutes once the kit exists. If it takes longer, the kit is probably too complicated.
A Simple 30-Minute Setup Plan
Here is a realistic first pass:
First 10 minutes: list your critical accounts and confirm recovery emails or phone numbers.
Next 10 minutes: generate or locate backup codes for your main email, password manager, and phone account.
Final 10 minutes: gather a charger, cable, SIM tool, blank cards, and one envelope. Put them in a pouch or drawer.
That is enough to start. You can improve it later.
Final Thought
A personal tech recovery kit is quiet insurance for modern life: small, boring, and incredibly useful on the day a screen goes black.
Found this useful?
Send it to someone who should read it.